
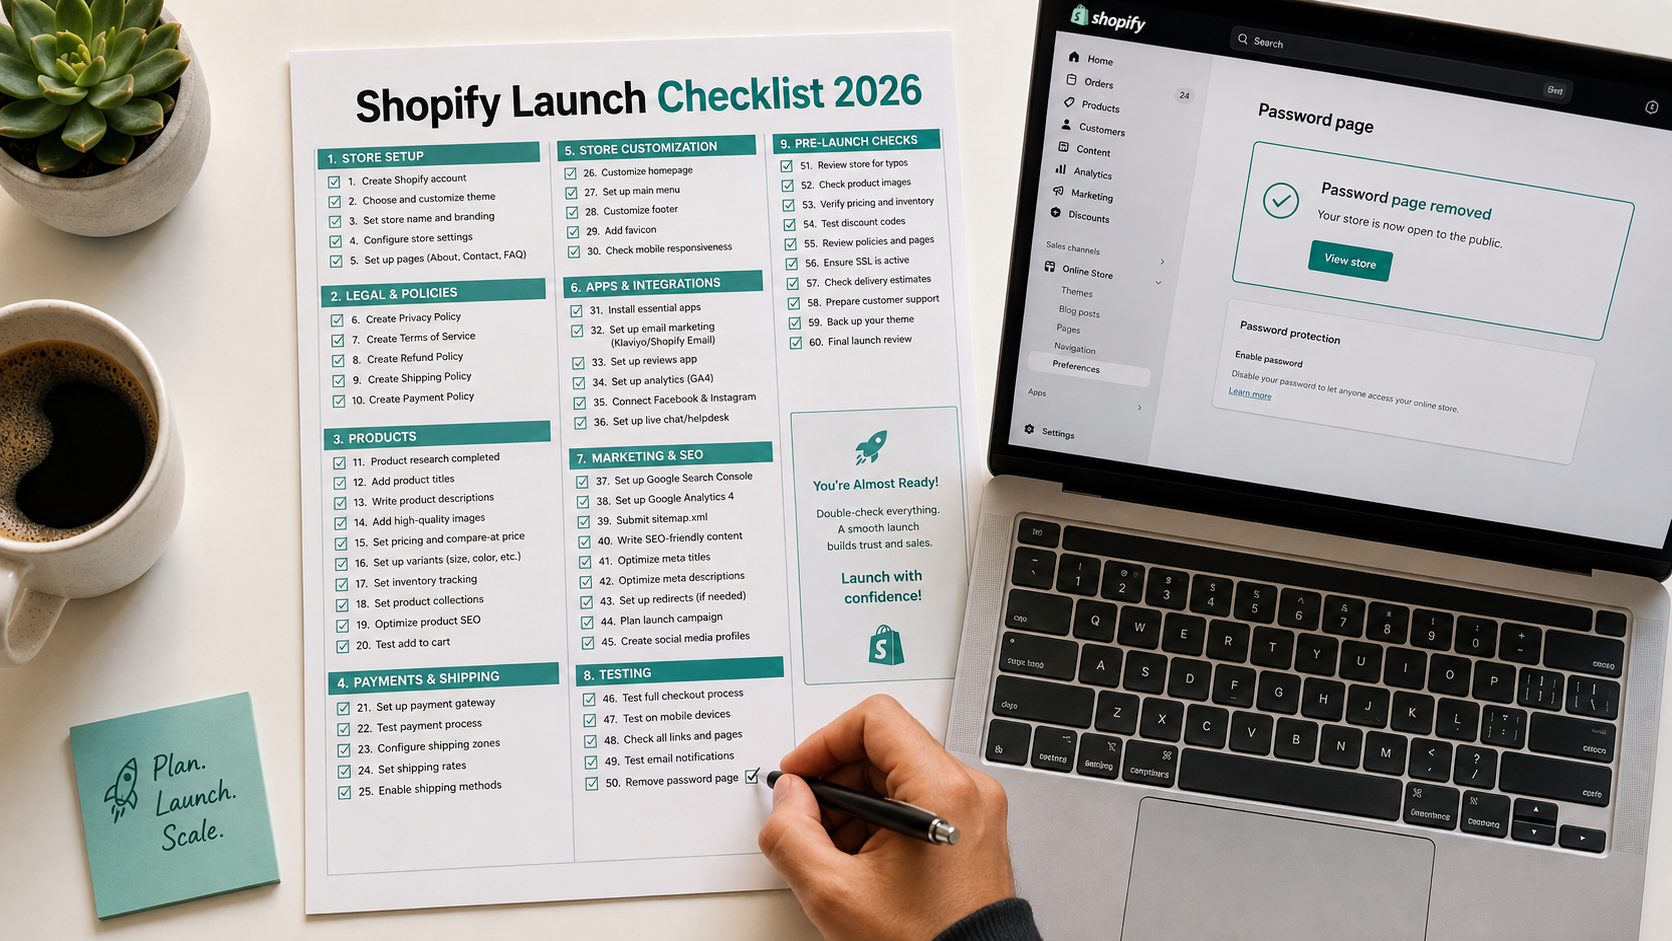
The Shopify Launch Checklist: 50 Things to Do Before You Go Live
The most expensive mistake in Shopify is launching too early.
Not because your products are not ready or your design is not polished enough — but because a broken checkout, missing legal pages, unverified analytics, or a store still sitting behind a password page will waste every visitor your launch traffic sends. The first impression a new customer has of your store is permanent. A confusing checkout, an out-of-stock product with no back-in-stock option, or a homepage that does not render correctly on mobile will not be forgiven by a first-time visitor who has no existing trust with your brand.
Most Shopify launches go wrong not because the platform is hard but because merchants rush from theme setup to live without validating the basics. The payment gateway looks right in settings but has not been test-ordered. The shipping rates look configured but produce impossible results for international destinations. The email marketing platform is installed but not actually connected to the subscriber form. These gaps are invisible on the admin side and catastrophic on the customer side.
This checklist covers 50 specific things to complete before removing your password page and telling the world your store is open. Work through it in order — the sections build on each other — and by the time you reach item 50, you will have a store that is genuinely ready to convert on day one.
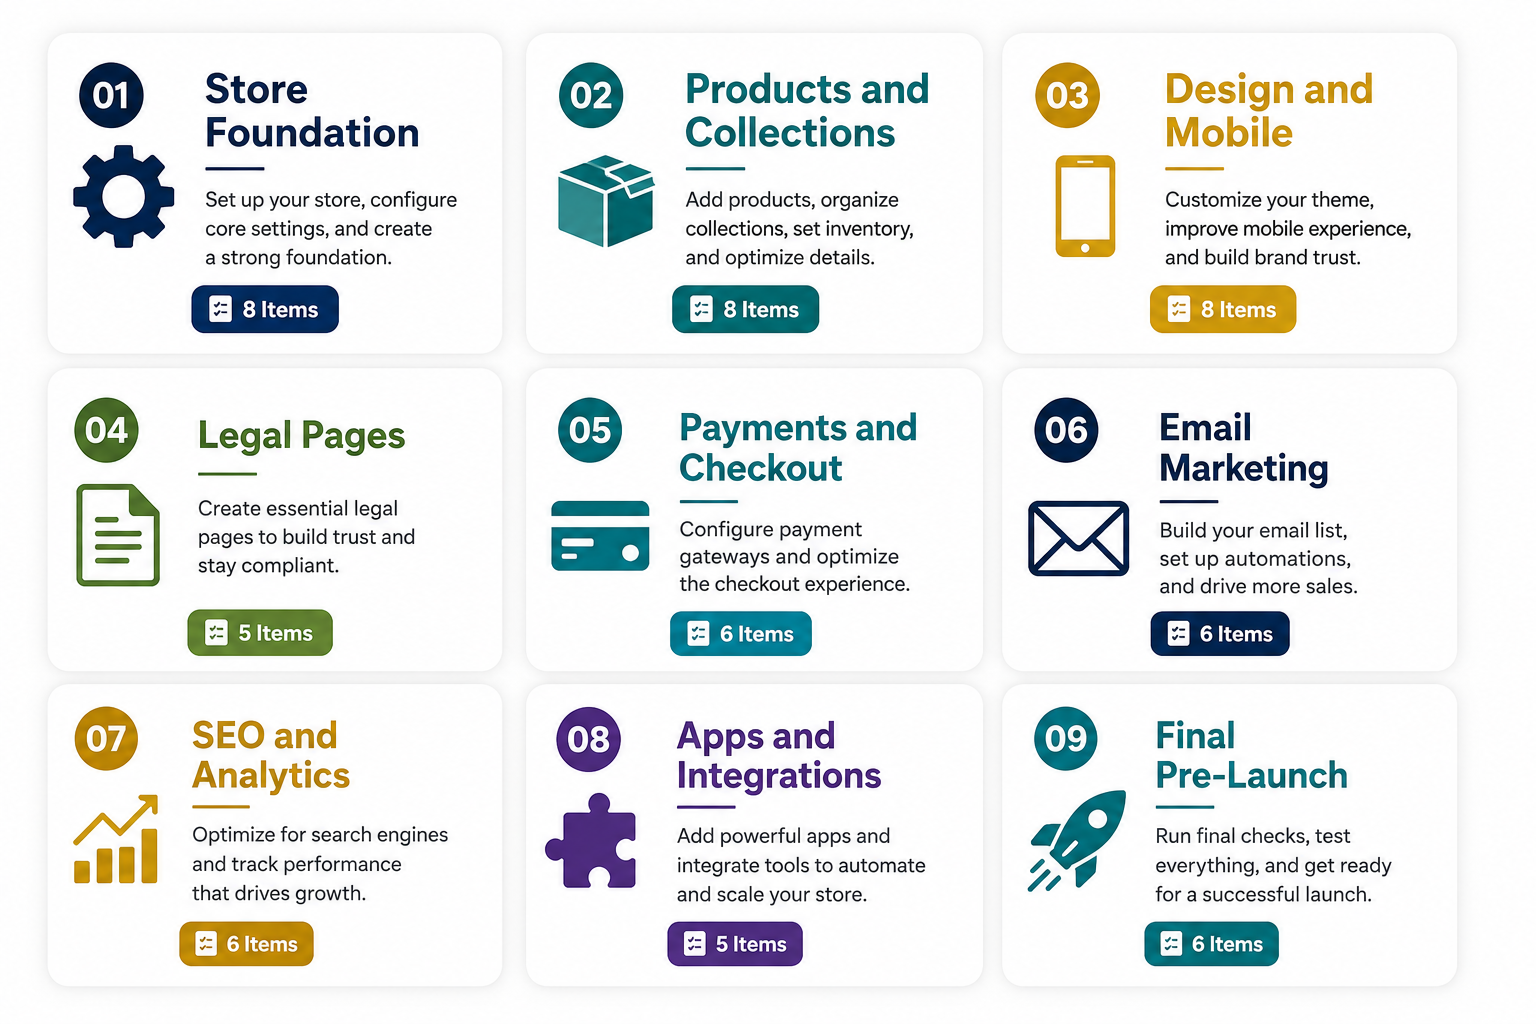
Section 1: Store Foundation and Settings (Items 1 to 8)
1. Custom domain connected and live Your store should be accessible at yourstore.com — not yourstore.myshopify.com. In Shopify Admin go to Settings, then Domains, and connect or purchase your custom domain. Verify the domain is pointing correctly by visiting it from an external browser. A myshopify.com URL signals an unfinished store and reduces customer trust immediately.
2. Store name and business details complete In Settings, then Store Details, ensure your store name, business address, phone number, and contact email are all completed and accurate. These details populate your legal pages, order notifications, and tax documents automatically — incorrect information here creates downstream errors across multiple customer-facing documents.
3. Currency and region settings configured In Settings, then General, set your store currency to match your primary market. If you are selling in multiple regions, verify that your currency and regional settings reflect your actual customer base. Displaying prices in the wrong currency for your primary audience is a conversion killer that is easy to miss until a customer complains.
4. Time zone set correctly In Settings, then General, set your store time zone to your business location. This affects your analytics, your scheduled discount end times, and your automated email flow triggers. A misset time zone causes discount codes to expire at the wrong moment and email automations to fire at unexpected hours.
5. Shopify plan confirmed for your needs Verify your current plan covers the transaction fees, staff accounts, and features you need. Shopify Basic suits single-operator stores with modest volume. Shopify plan reduces transaction fees and adds professional reporting. Advanced Shopify and Plus suit stores with significant revenue and multi-staff operations. Launching on the wrong plan costs either unnecessary monthly fees or unexpected transaction costs.
6. Payment providers enabled and tested In Settings, then Payments, enable Shopify Payments if available in your country — it eliminates transaction fees entirely. Enable Shop Pay for accelerated checkout. Enable PayPal as a secondary option for customers who prefer not to enter card details directly. All payment providers need to be enabled and verified before launch, not after.
7. Fraud protection settings configured In Shopify Payments settings, review your fraud filter thresholds. The default settings protect against the most common fraud patterns, but stores in high-risk categories — electronics, luxury goods, gift cards — should increase sensitivity. Launching without fraud protection configured invites chargebacks that are expensive to dispute and damage your payment processor standing.
8. Email address for customer notifications verified In Settings, then Notifications, verify that your customer-facing sender email address is a professional domain email — hello@yourstore.com — not a personal Gmail or Yahoo address. Transactional emails sent from a branded domain have higher delivery rates and present a more professional image to customers.
Section 2: Products and Collections (Items 9 to 16)
9. All products published and correctly priced Review every product in your catalog. Confirm each is published to your Online Store sales channel, priced correctly, and categorized in the right collection. A product that is accidentally set to draft status or published to the wrong sales channel is invisible to customers despite appearing active in your admin.
10. Product titles optimized for search Each product title should follow the structure of Brand plus Product Name plus Key Differentiator. Include the primary keyword a buyer would search to find the product. Generic titles like "Blue Shirt" perform poorly both for search ranking and for customer confidence. "Organic Cotton Button-Down Shirt in Navy — Men's Slim Fit" is specific, keyword-rich, and descriptive.
11. Product descriptions written and benefit-focused Every product needs a description that opens with benefit language — what the customer gains from buying — followed by specific product details in bullet points. A product with no description or a manufacturer-copied description signals a low-effort store and consistently reduces conversion rates compared to original, well-written content.
12. High-quality images uploaded for every product Minimum of four images per product: front view, back or detail view, lifestyle or in-use image, and scale reference. Images should be at least 2048 x 2048 pixels, compressed to WebP format for performance, and consistent in background treatment across your catalog. Inconsistent or low-quality images are the most common reason new stores look unfinished.
13. Inventory quantities set accurately Verify that inventory counts in Shopify reflect actual available stock for every variant. Launching with incorrect inventory numbers causes either orders you cannot fulfill or available products appearing sold out. If you are dropshipping, verify your supplier's current stock levels before publishing products.
14. Product variants correctly configured For products with variants — size, color, material — verify that every combination is correctly set up, every variant has an image assigned, and every variant that is available is published. A size selector that shows unavailable options without marking them as such creates customer frustration and checkout abandonment.
15. Collections organized logically Your collections should match how customers think about your product categories, not how you organize your back catalog. If customers shop by occasion, organize by occasion. If they shop by product type, organize by type. Review your collection structure from a first-time visitor's perspective — can you find any product within two or three clicks from the homepage?
16. Featured collection on homepage driving traffic to your best products Your homepage collection feature should highlight your bestselling, most visually appealing, or most seasonally relevant products — not whatever happens to be first alphabetically. The products visible on your homepage without scrolling are the products that convert the most first-time visitors. Choose them deliberately.
Section 3: Design and Mobile Experience (Items 17 to 23)
17. Theme customized with brand colors, fonts, and logo Your store should not look like the default theme demo. At minimum: your brand colors applied to buttons and accents, your logo uploaded to the header, and your font choices reflecting your brand positioning. Default Dawn or Debut stores with zero customization signal an unfinished business to every visitor.
18. Homepage layout reviewed and optimized Your homepage needs a clear hero section communicating what you sell and who you sell it to, a featured collection showcasing your best products, and a trust-building section featuring reviews, press mentions, or a brand story element. Visitors who cannot understand what your store sells within five seconds will leave.
19. Navigation menu tested and logical Your primary navigation should contain your most important collections, an About page link, and a contact or support option. Test every navigation link to confirm it resolves correctly and the destination page matches the label. A navigation link that goes to a 404 page or the wrong collection destroys trust instantly.
20. Full mobile experience reviewed on a real device Open your store on an actual smartphone — not a browser emulation tool — and complete the full customer journey: browse a collection, open a product, select a variant, add to cart, proceed to checkout. Every friction point you encounter as a tester is a friction point a customer will encounter. Fix mobile issues before launch, not after.
21. Page load speed checked and optimized Test your homepage in Google PageSpeed Insights and target a mobile score above 60 and a Largest Contentful Paint under 3 seconds. If your score is significantly below these benchmarks, review your installed apps — each app adds JavaScript to your page — and your image file sizes. Launching a slow store sends traffic to a page that bounces before it loads.
22. Favicon uploaded The small icon that appears in browser tabs and bookmarks should be your logo or brand mark rather than the generic Shopify icon. In Online Store, then Themes, then Customize, upload your favicon under the Theme Settings section. A missing favicon is a small detail that subconsciously signals an unfinished store to experienced online shoppers.
23. 404 page customized When a customer reaches a broken link or mistypes a URL, your 404 page is what they see. The default Shopify 404 page is functional but generic. A customized 404 page with a search bar, links to your main collections, and a friendly message retains customers who would otherwise bounce from the error.
Section 4: Legal Pages and Policies (Items 24 to 28)
24. Privacy policy published and accurate Your privacy policy is a legal requirement in the EU under GDPR, in the UK under UK GDPR and PECR, in California under CCPA, and increasingly under US state-level privacy laws. Shopify provides a privacy policy generator in Settings, then Policies, that creates a solid foundation — review it to ensure it accurately reflects your data collection practices, including any third-party apps you use.
25. Terms of service page live Your terms of service protects your business in disputes about orders, returns, and customer conduct. Generate a template through Shopify's policy generator, review it against your actual store policies, and publish it. Link it from your checkout and footer.
26. Refund and return policy clear and specific Your return policy should state exactly how long customers have to return, what condition items must be in, who pays return shipping, and how long refunds take to process. Vague language — "contact us for returns" — creates customer anxiety before purchase and complaints after. Specific language — "Returns accepted within 30 days of delivery. Return shipping is free for exchanges, $6.95 for refunds. Refunds processed within 5 business days of receiving your return" — builds pre-purchase confidence.
27. Shipping policy published Your shipping policy should cover your processing time, estimated delivery timeframes for each shipping option you offer, and your policy on delayed or lost shipments. Customers check shipping information before completing high-value purchases. A missing or vague shipping policy reduces conversion rates for orders where delivery timing matters.
28. All policy pages linked from footer and checkout In Shopify Admin, go to Settings, then Checkout, and ensure your privacy policy, terms of service, and refund policy are linked in the checkout footer. These links appear on the checkout page where customers are making their purchase decision. A checkout without visible policy links feels less trustworthy than one where customers can verify your policies at the final step.
Section 5: Payments and Checkout (Items 29 to 34)
29. Test order completed successfully Before removing your password page, place a real test order through your complete checkout — using a real card or Shopify's Bogus Gateway test mode. Verify that the confirmation email arrives, the order appears in your admin, and inventory decrements correctly. A checkout that looks correct in settings but fails in practice is the most critical pre-launch issue to catch.
30. Shop Pay enabled Shop Pay allows returning Shopify customers to check out with a single tap using saved payment and shipping details. Enabling it before launch means every Shop Pay user who visits your store can convert faster from day one. It consistently improves conversion rates by 4 to 8% for eligible stores.
31. Buy Now Pay Later option activated For stores with average order values above $75, enabling Afterpay, Klarna, or Affirm — depending on your target market — reduces the perceived upfront cost and increases conversion for higher-priced items. Configure in Settings, then Payments, and verify the BNPL option appears correctly on product pages and at checkout.
32. Tax settings configured correctly In Settings, then Taxes and Duties, configure tax collection based on your business location and the regions you sell to. Tax misconfiguration either collects taxes you are not obligated to collect — which inflates displayed prices and reduces conversion — or fails to collect taxes you are legally required to remit. If you are unsure about your tax obligations, consult a tax professional before launch.
33. Shipping rates configured and logical In Settings, then Shipping and Delivery, verify that your shipping zones cover every region you intend to sell to and that rates are configured accurately for each zone. Test the shipping rate calculation by adding a product to cart and proceeding to checkout from a billing address in each major region you serve. Rates that produce impossible results — free shipping to every country when you only ship domestically — or missing rates for common destinations will cause checkout abandonment or customer complaints.
34. Guest checkout enabled In Settings, then Checkout, set customer accounts to optional rather than required. Forcing account creation before purchase is one of the most documented causes of checkout abandonment. A new customer who wants to complete their first purchase without registering should be able to do so immediately.
Section 6: Email Marketing and Customer Capture (Items 35 to 39)
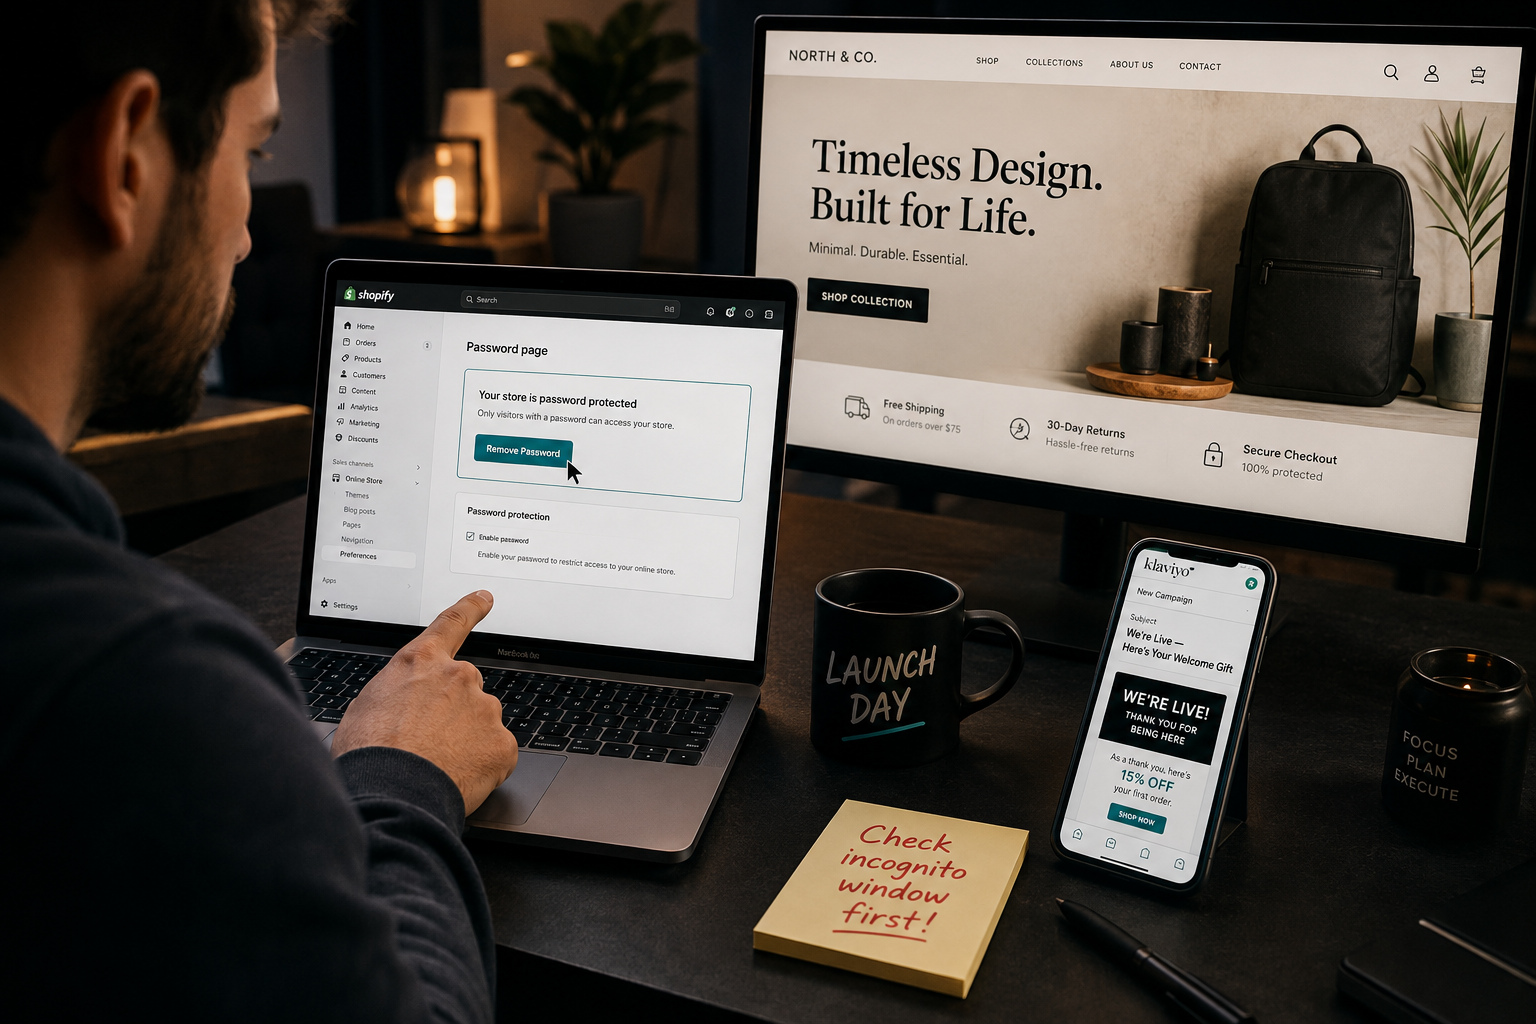
35. Email marketing platform connected Connect Klaviyo, Shopify Email, or your preferred email platform to Shopify before launch. This ensures subscriber data flows automatically from your popup and checkout opt-in to your email platform from the first visitor. Attempting to retroactively import subscriber data after launch loses anyone who opted in during your launch period and did not convert.
36. Welcome email flow active Your welcome email series should be live before launch — not added after you have already sent a hundred first emails that received no follow-up. The welcome series is the highest-engagement email sequence your store will ever send and should begin warming new subscribers from the first day your store is live.
37. Email capture popup configured and tested A popup offering a first-purchase discount or value exchange should appear after 30 seconds of site engagement — not immediately on page load. Test it across desktop and mobile to confirm the timing, the form submission, and the confirmation message all work correctly. A popup that fires immediately on every page load damages the user experience without improving list growth.
38. Abandoned cart email flow configured Your abandoned cart sequence — three emails at 30 minutes, 12 to 24 hours, and 24 to 48 hours — should be active before launch because your very first visitors who abandon carts will receive nothing if this automation is not live. Recovering even 5% of abandoned carts from launch traffic represents meaningful early revenue that most new stores lose entirely.
39. Order notification emails reviewed and branded The order confirmation, shipping notification, and delivery confirmation emails sent automatically by Shopify carry your brand voice and create the post-purchase experience. Review the default Shopify notification templates in Settings, then Notifications, and customize them with your brand tone, logo, and any product care or usage guidance that reduces returns or increases satisfaction.
Section 7: SEO and Analytics (Items 40 to 45)
40. Google Analytics 4 installed and verified Install the GA4 property through your Shopify admin or Google and Shopify integration. Verify it is receiving data by checking the Real-time report in GA4 while browsing your store from a separate browser. Launching without analytics means your first week of traffic data — the most valuable learning period in your store's history — is permanently lost.
41. Meta Pixel and Conversions API installed If you plan to run Meta Ads within the first 90 days of launch — and you should — install the Meta Pixel before launch so it begins accumulating the audience data that powers your ad targeting. Launching ads to a cold pixel with no data always underperforms launching ads to a pixel that has already observed purchase events and page views from organic traffic.
42. Google Search Console verified Verify your store in Google Search Console using the HTML tag method — paste the meta tag in your Shopify theme's Additional Scripts field. Submit your sitemap — typically yourstore.com/sitemap.xml — once verified. Search Console is how you monitor whether Google is indexing your pages correctly and identify any crawl errors that prevent ranking.
43. All product page meta titles and descriptions written Every product page should have a custom meta title and meta description written in the SEO section of the product editor. Default meta titles that pull the product name without additional context miss the opportunity to include the search terms buyers use to find your products. A well-written meta description increases click-through rates from search results by communicating the value proposition in 155 characters.
44. Homepage meta title and description optimized Your homepage meta title should include your brand name and your primary product category — "EcomStore — Premium Organic Skincare Delivered to Your Door" rather than just your store name. The homepage is typically your most visible search result and deserves the same SEO attention as your product pages.
45. Image alt text added to all product images Alt text serves two purposes: it describes images to visually impaired users accessing your store through screen readers, and it provides keyword context to search engines that cannot interpret images directly. Add descriptive, keyword-relevant alt text to every product image — "Women's organic cotton yoga pants in forest green, front view" rather than "image1.jpg."
Section 8: Apps and Integrations (Items 46 to 48)
46. App performance audited before launch Every installed app adds JavaScript to your store and slows page load time. Before launch, go to your Shopify admin and check the App Performance score for each installed app. Remove any app you installed during setup but do not actively use — a store that launched with ten apps installed and only uses four of them is carrying six apps' worth of page speed cost for no return.
47. Essential apps confirmed working Verify that every app you intend to use at launch — email marketing, reviews, loyalty, live chat — is correctly connected to your store data and functioning as expected. An email marketing app that appears installed but is not actually receiving subscriber data, or a reviews app that is installed but showing no reviews panel on product pages, is invisible until a customer notices the gap.
48. Reviews system seeded with initial social proof A product page with zero reviews converts at dramatically lower rates than one with even five or ten reviews. Before launch, reach out to friends, family, or early testers who have used your product and ask them to submit genuine reviews through your review platform. Even ten authentic reviews across your key products significantly improve first-day conversion rates for new visitors who have no other basis for trust.
Section 9: Final Pre-Launch Checks (Items 49 to 50)
49. Password page removal confirmed The most embarrassing launch mistake in Shopify history is announcing your store to your entire email list, posting across social media, and running your first paid ads — all while your store is still behind the password page. In Shopify Admin, go to Online Store, then Preferences, scroll to the Password Protection section, and uncheck "Restrict access to your storefront with a password." Confirm the removal by visiting your store in an incognito browser window before making any public announcement.
50. Full customer journey tested by someone who did not build the store Ask three to five people who have not been involved in building your store to complete a full purchase journey — from homepage through to order confirmation — on their own devices without guidance from you. Observe where they hesitate, what questions they have, and what they cannot find without asking. Every confusion point they encounter is a conversion gap that you normalized because you know where everything is. Fresh eyes before launch are the most valuable QA tool available to any Shopify merchant.
The Launch Day Sequence
Once all 50 items are complete, your launch day sequence:
Remove the password page in your Shopify admin. Send your launch announcement email to every subscriber on your list with a clear call to action and your best launch offer. Post your launch announcement across every social media channel you have been building pre-launch. If you are running paid ads, activate your Meta or Google campaigns now that your pixel has been verified and your store is publicly accessible. Submit your homepage and key product pages to Google Search Console for indexing.
Monitor your Shopify admin, your email platform, and your analytics dashboards in real time for the first two hours. The most common launch day issues — a checkout error affecting specific payment methods, a shipping rate miscalculation for a specific region, or an inventory sync error — are easiest to resolve within the first hour when traffic is manageable.
The First 72 Hours After Launch
Launching is not finishing. It is starting. The 72 hours after launch are your highest-learning period.
Review your Google Analytics session data to understand which pages visitors are landing on, where they are dropping off, and which traffic sources are converting. Check your abandoned cart data to identify at what point in the checkout customers are leaving. Read every customer review, email reply, and support message for feedback on the purchase experience. Fix every friction point you identify before your traffic scales.
The stores that generate consistent revenue from day one are not necessarily the ones with the best products or the biggest audiences. They are the ones that validated every step of the customer journey before removing the password page — and continued refining that journey in the hours and days after launch.
The checklist above is the foundation. What you build on it from launch day forward is the store.
Need help building or launching your Shopify store correctly from day one, or want an expert to review your pre-launch setup for conversion gaps? Get in touch with EcomFixify — we specialize in Shopify development and store launch optimization for new and growing brands.