
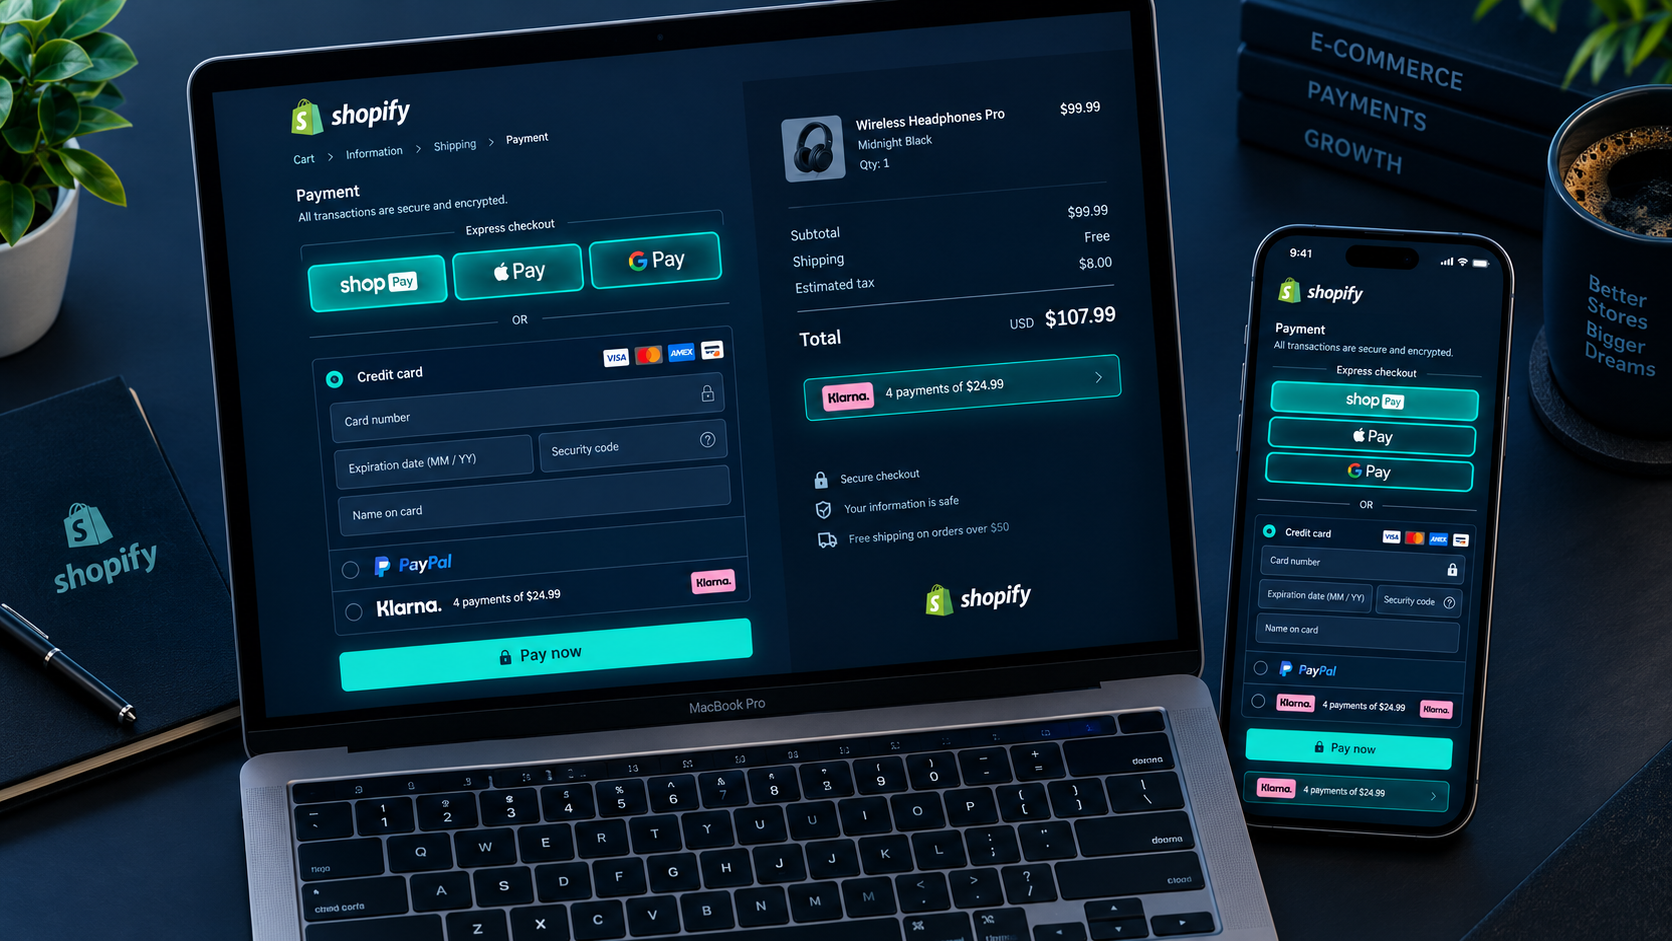
How to Set Up Shopify Payments and Accept Every Payment Method in 2026
Every sale you lose at checkout is a sale you already paid to acquire. You spent money on ads, invested time in content, built a product page that convinced someone to buy — and then they reached the payment step, did not see their preferred payment method, and left without completing the order.
Payment friction is one of the least visible and most expensive conversion killers in Shopify ecommerce. A checkout that does not support the payment method a customer prefers generates an abandonment that shows up in your analytics as a generic drop-off. It does not announce itself as a payment failure. It just disappears, silently, along with the revenue it would have generated.
The solution is straightforward: configure your Shopify store to accept every relevant payment method for your target audience — credit and debit cards, digital wallets, Buy Now Pay Later options, local payment methods for international customers, and manual payment methods for specific use cases. In 2026, a fully configured Shopify payment setup takes less than two hours to build and can meaningfully improve checkout conversion rates the moment it goes live.
This guide covers every component of that setup — what each payment method is, who needs it, how to configure it, and how to avoid the most common configuration mistakes that silently cost merchants sales.
Understanding Shopify's Payment Architecture
Before configuring individual payment methods, understanding how Shopify's payment architecture is structured prevents the configuration errors that are frustratingly common among merchants setting up their store for the first time.
Shopify's payment system has two layers that work together. The payment gateway is the technology that handles the secure transmission of payment data between your customer, your store, and the financial institutions involved in processing the transaction. The payment processor is the service that actually moves money — authorizing the transaction, settling funds, and depositing revenue into your bank account.
Most traditional ecommerce setups required merchants to establish relationships with a separate gateway and processor, integrate them individually, and manage two separate sets of credentials, reports, and support relationships. Shopify Payments eliminates this complexity by combining both functions into a single native solution — powered by Stripe's infrastructure — that activates directly inside your Shopify admin with no external accounts or API integrations required.
When Shopify Payments is active, Shopify waives its additional transaction fee — the percentage charged on every sale when using third-party processors — on all plans. On the Basic plan, that waiver is worth 2% of every transaction. On the Shopify plan, it is worth 1%. On Advanced, it is 0.5%. For a store generating $10,000 per month, activating Shopify Payments rather than a third-party processor saves $200 per month on the Basic plan — $2,400 per year — simply from eliminating the transaction fee.
If Shopify Payments is available in your country, it should be your primary payment processor. The fee savings, the native integration, the unified reporting, and the accelerated checkout options it enables are collectively significant enough that there is almost no scenario where a third-party processor delivers better value for the majority of Shopify merchants.
Step 1: Setting Up Shopify Payments
Shopify Payments is available in 39 countries as of 2026, including the United States, United Kingdom, Canada, Australia, Ireland, Germany, France, Spain, Italy, the Netherlands, Singapore, Hong Kong, Japan, and New Zealand. For merchants in supported countries, setup takes approximately 15 to 20 minutes.
Before beginning, gather the following information. For the business section: your legal business name, business address, and business type — whether you operate as a sole proprietorship, LLC, corporation, or partnership. For identity verification: a government-issued photo ID such as a passport or driver's license, your date of birth, and the last four digits of your Social Security Number or equivalent national identification number depending on your country. For banking: the name on your bank account, your bank routing number, and your checking account number. Note that Shopify Payments requires a checking account — savings accounts are not supported.
To activate Shopify Payments, navigate to your Shopify admin and click Settings in the bottom left navigation. Click Payments from the Settings menu. If Shopify Payments is available in your country, you will see a section for it at the top of the page. Click the Complete account setup button and work through the verification form, entering your business information, personal identity details, and banking information exactly as they appear on your official documents.
Shopify submits this information for verification, which typically completes within one to two business days for straightforward applications. You can begin configuring other payment settings while verification is pending — your store will be able to accept payments as soon as verification is approved.
Two configuration settings inside Shopify Payments are worth reviewing immediately after activation. Payment capture mode — which defaults to Automatic Capture, meaning funds are charged at the moment of purchase — works correctly for most stores. If you sell pre-orders, custom products, or B2B goods that ship significantly after purchase, Manual Capture allows you to authorize a card at checkout and charge it when the order ships. Payout schedule — which controls how frequently Shopify transfers your store's revenue to your bank account — defaults to daily but can be adjusted to weekly if your accounting workflow benefits from less frequent reconciliation.
Step 2: Enabling Digital Wallets — Your Highest-Impact Single Configuration
Digital wallets — Shop Pay, Apple Pay, and Google Pay — are not optional extras in 2026. They are the payment methods that generate the most meaningful conversion lift of any configuration change available to Shopify merchants.
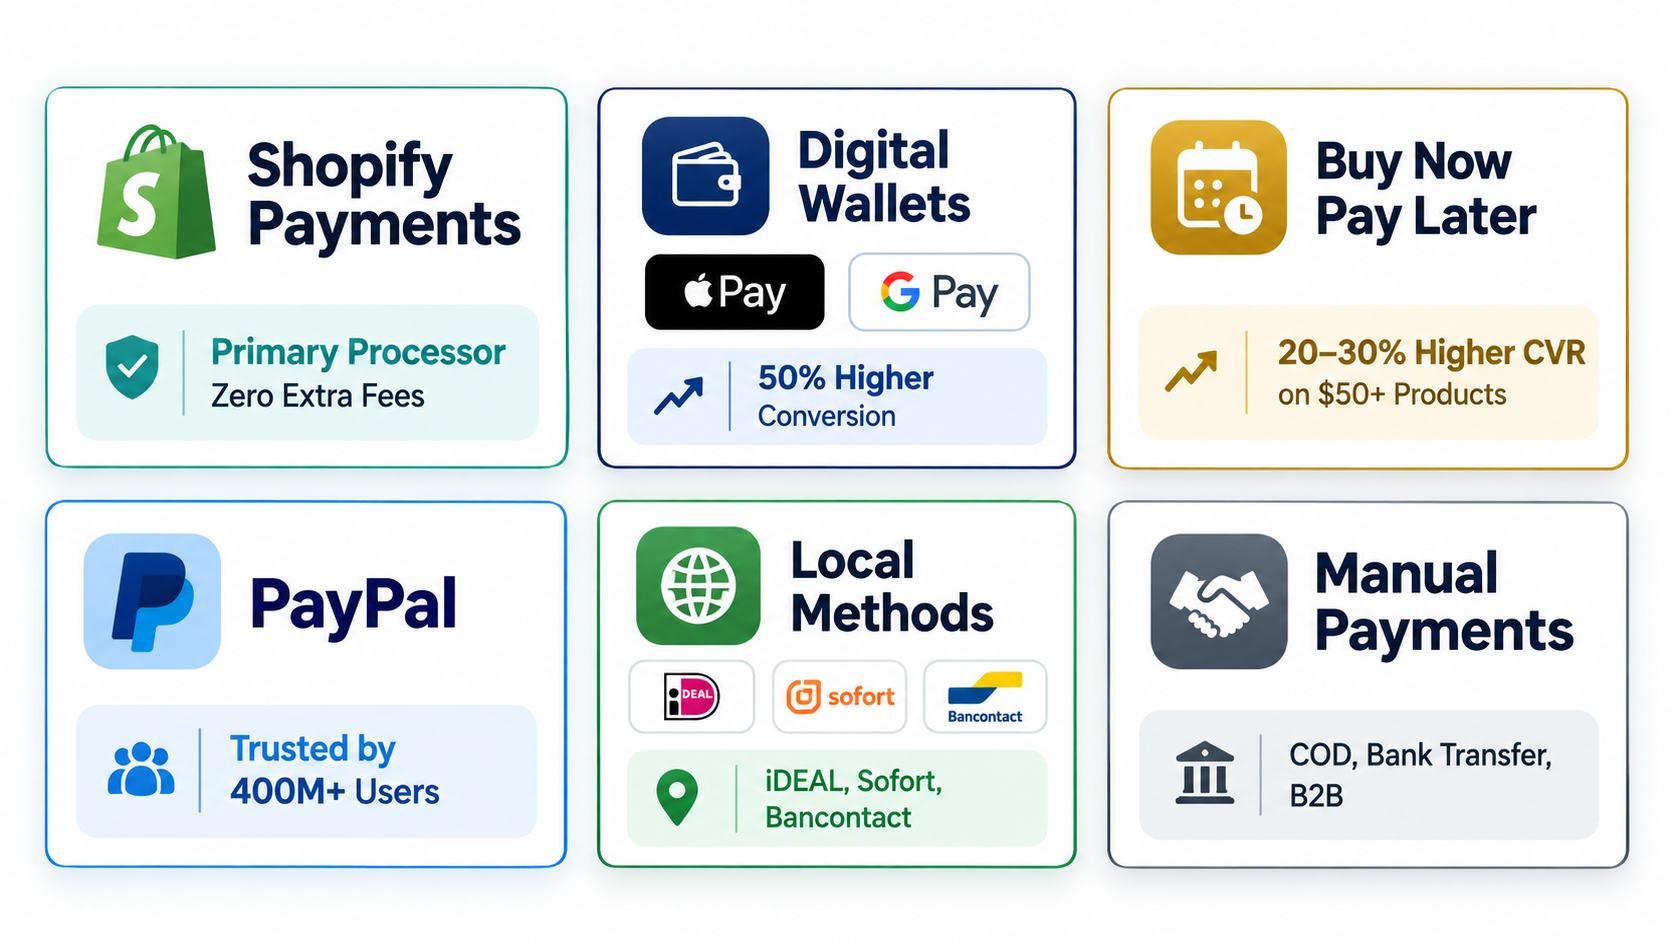
Digital wallet transactions convert 50% higher than traditional card-entry checkouts. The reason is structural: a customer paying with Apple Pay on mobile authenticates with a single Face ID or Touch ID scan and completes the entire purchase in under 10 seconds without typing a card number, expiry date, billing address, or shipping information. Removing every one of those entry requirements removes the friction that causes mobile checkout abandonment.
Shop Pay is Shopify's accelerated checkout option and the most important of the three to enable. Shop Pay stores customer details — email, shipping address, and payment information — for any customer who has completed a Shop Pay transaction at any Shopify store. When those customers visit your store, they can complete checkout with a single six-digit verification code rather than entering their details from scratch. Shop Pay achieves a 72% higher checkout completion rate compared to guest checkout and a 91% higher rate on mobile specifically.
When Shopify Payments is active, Shop Pay, Apple Pay, and Google Pay are enabled automatically. To confirm they are active and correctly positioned, navigate to Settings, then Payments, and scroll to the Accelerated Checkouts section. All three should show as active. To verify they are appearing correctly for customers, open your store on an iPhone browser — Apple Pay will show as a payment option — and on an Android Chrome browser — Google Pay will appear. Both should display as prominent buttons at the top of the checkout page above the standard form fields.
One configuration detail that significantly affects Shop Pay visibility: enable it as a payment option on product pages, not just at checkout. In your theme's customization settings, look for the dynamic checkout buttons option on product pages. When enabled, Shop Pay and other express payment options appear directly on product pages as "Buy now" buttons, allowing customers to bypass the cart entirely and complete a purchase in two taps. This placement consistently lifts conversion for impulse purchases and single-product stores.
Step 3: Configuring Buy Now Pay Later Options
Buy Now Pay Later has moved from a niche payment option to a mainstream consumer expectation. Stores offering BNPL options see 20 to 30% higher conversion rates on products priced above $50. For higher-ticket items — furniture, electronics, premium apparel, fitness equipment — BNPL can be the difference between a completed purchase and an abandoned one, because it makes the immediate financial commitment feel significantly smaller.
Shop Pay Installments is Shopify's native BNPL option, available to eligible merchants in the United States, Canada, and the United Kingdom through Shopify Payments. It allows customers to split purchases into four interest-free bi-weekly payments or up to 12 monthly installments depending on the order total. The merchant receives the full purchase amount upfront — Shopify's financial partner absorbs the installment risk — while the customer pays over time. There is no additional setup cost; Shop Pay Installments activates automatically for eligible merchants with Shopify Payments enabled.
For merchants who want additional BNPL provider options — or who want BNPL in countries not yet supported by Shop Pay Installments — Klarna, Afterpay, and Affirm all integrate with Shopify through the Alternative Payment Methods section in your payment settings. To add any of these, navigate to Settings, then Payments, scroll to the Buy Now Pay Later section, click Choose a provider, search for your preferred BNPL service, and click the activation button. Each provider will walk you through their specific account connection process, which typically involves logging into an existing account or creating a new merchant account with that provider directly.
The most important display configuration for BNPL: ensure the installment payment option is visible on product pages, not only at checkout. Displaying "4 payments of $24.99 with Shop Pay" directly below the price on a product priced at $99.99 reduces price shock before the customer even begins the checkout flow. In Shopify admin, navigate to the theme editor and look for a payment plan messaging widget or price display option — many Shopify themes support this natively in their product page settings.
Step 4: Adding PayPal
PayPal is the most widely trusted payment brand in ecommerce globally. Despite the rise of digital wallets and accelerated checkout options, a significant segment of online shoppers — particularly in North America and Europe, and strongly among customers over 35 — prefer PayPal for online purchases because they feel more comfortable sharing PayPal credentials than entering card details on unfamiliar stores.
PayPal Express Checkout integrates with Shopify as an alternative payment provider and runs alongside Shopify Payments without conflict. To add PayPal to your store, go to Settings, then Payments, scroll to the Alternative Payment Methods or third-party providers section, click Choose a provider, and search for PayPal. Click PayPal and then the Connect or Activate button.
If you already have a PayPal business account, log in when prompted and grant the permission requested. If you do not have a PayPal business account, you will be directed to create one — which requires a business email address, business name, and bank account for PayPal payouts. PayPal manages its own payout schedule independently of your Shopify Payments payout — funds received through PayPal land in your PayPal account rather than your bank account directly, until you manually or automatically transfer them.
One PayPal setting worth configuring immediately after connection: in your PayPal merchant settings, enable Reference Transactions if you plan to offer subscriptions or recurring billing through your Shopify store. Without Reference Transactions enabled, PayPal cannot process recurring charges, which will prevent subscription orders from processing correctly for customers who selected PayPal as their payment method.
Step 5: Setting Up Local Payment Methods for International Customers
For Shopify stores selling internationally — or planning to — local payment methods are the most frequently overlooked and most conversion-impactful configuration available. 76% of online shoppers prefer paying in their local currency and with locally familiar payment methods. A checkout that does not offer the payment method a customer regularly uses online is a checkout that converts at a fraction of its potential in that market.
Local payment preferences vary significantly by country. In Germany and the Netherlands, bank transfer methods — specifically Sofort and iDEAL — are strongly preferred over card payments for online purchases. iDEAL alone accounts for over 60% of online transactions in the Netherlands. A Dutch customer who reaches a Shopify checkout offering only Visa and Mastercard will abandon at a dramatically higher rate than one who also sees iDEAL as an option.
In Belgium, Bancontact is the dominant local payment method with near-universal adoption. In Austria, EPS bank transfer is widely used. In Poland, Przelewy24 processes the majority of online banking transactions. In Brazil, Boleto Bancário — a printable payment slip — is used by a significant percentage of the population that does not have credit cards.
To enable local payment methods for your target international markets, navigate to Settings, then Payments, scroll to the Local Payment Methods section within Shopify Payments. Shopify displays available local methods based on the countries included in your active markets. For each international market you have configured in Shopify Markets, the relevant local payment methods for that region appear here and can be toggled on individually.
For markets where Shopify Payments is not available — notably many countries in Southeast Asia, the Middle East, and Africa — third-party regional payment gateways handle the local payment requirement. Popular options that integrate with Shopify include Razorpay for India, PayFast for South Africa, Paystack for Nigeria and Ghana, and HyperPay for the GCC region. Each appears in the Alternative Payment Methods search in your payment settings and connects through the provider's own merchant account.
Step 6: Enabling Manual Payment Methods
Manual payment methods — cash on delivery, bank transfer, and money order — are relevant for specific business models and target markets where digital payment adoption is lower or where customer preference runs strongly toward cash-based transactions.
Cash on delivery (COD) remains the dominant payment preference in many markets across Pakistan, India, the Middle East, and parts of Southeast Asia. For merchants targeting these regions, not offering COD eliminates a significant segment of potential customers who are genuinely interested in the product but will not — or cannot — pay online.
To add a manual payment method in Shopify, go to Settings, then Payments, scroll to the Manual Payment Methods section at the bottom of the page, and click Add manual payment method. Select from Cash on Delivery, Bank Deposit, or Money Order, or create a custom manual payment method with your own name and instructions.
For COD, write clear instructions in the payment description field explaining the collection process — when payment will be collected, by whom, and in what form. For bank transfer, include your complete banking details in the instructions field so customers have everything they need to complete the transfer without contacting support. For B2B stores offering net payment terms — Net 30 or Net 60 — create a custom manual payment method named appropriately and use the instructions field to outline your payment terms and invoicing process.
Step 7: Configuring Gift Cards
Gift cards serve two purposes simultaneously: they generate immediate revenue when sold and drive future purchase behavior when redeemed. A customer who receives a $50 gift card for your store frequently spends more than $50 in total — motivated by not wanting their credit to go to waste — creating an average order value lift from gift card redemptions.
To enable gift cards in Shopify, navigate to Products in your admin and click Gift Cards. Click Issue Gift Card to create individual gift cards for specific customers, or click the gift card product creation option to create a purchasable gift card product that appears in your store for customers to buy as gifts for others.
Gift card products can have multiple denominations — $25, $50, $100, $200 are common options — and are delivered digitally via email immediately after purchase. No physical fulfillment is required. Gift cards created in Shopify are redeemable at checkout as a payment method automatically, appearing as an option when a customer enters their gift card code at checkout.
Step 8: Fraud Protection and Security Configuration
A fully configured payment setup is only as strong as its fraud protection. Shopify includes a basic fraud analysis tool on all plans — flagging orders with high-risk signals like billing and shipping address mismatch, multiple failed payment attempts, or IP address inconsistencies — but additional protection is available and worth configuring for stores with meaningful transaction volume.
3D Secure authentication — also known as 3DS — adds an additional verification step for card transactions in markets where Strong Customer Authentication is legally required, specifically the European Union and the United Kingdom under PSD2 regulations. In these markets, 3DS is not optional — failure to implement it creates legal liability for the merchant. In Shopify Payments settings, 3DS is configured automatically for EU and UK transactions, but verify this is active if your store serves these markets.
Shopify Fraud Protect — available to eligible US merchants on Shopify Payments — covers the cost of fraudulent chargebacks on protected orders. For stores with higher order values or in categories with elevated fraud risk — electronics, jewelry, luxury goods — Fraud Protect removes the financial risk of chargebacks on qualifying orders and is worth evaluating against its cost on your specific transaction profile.
Step 9: Testing Your Complete Payment Setup
Before announcing your store is live or running paid traffic to it, test every payment method you have configured from the customer's perspective on both desktop and mobile.
Shopify provides a test mode within Shopify Payments that allows you to process simulated transactions without charging real cards. In Settings, then Payments, look for the Enable Test Mode option and activate it. Use Shopify's published test card numbers — available in their help documentation — to simulate successful payments, declined transactions, and specific card type scenarios.
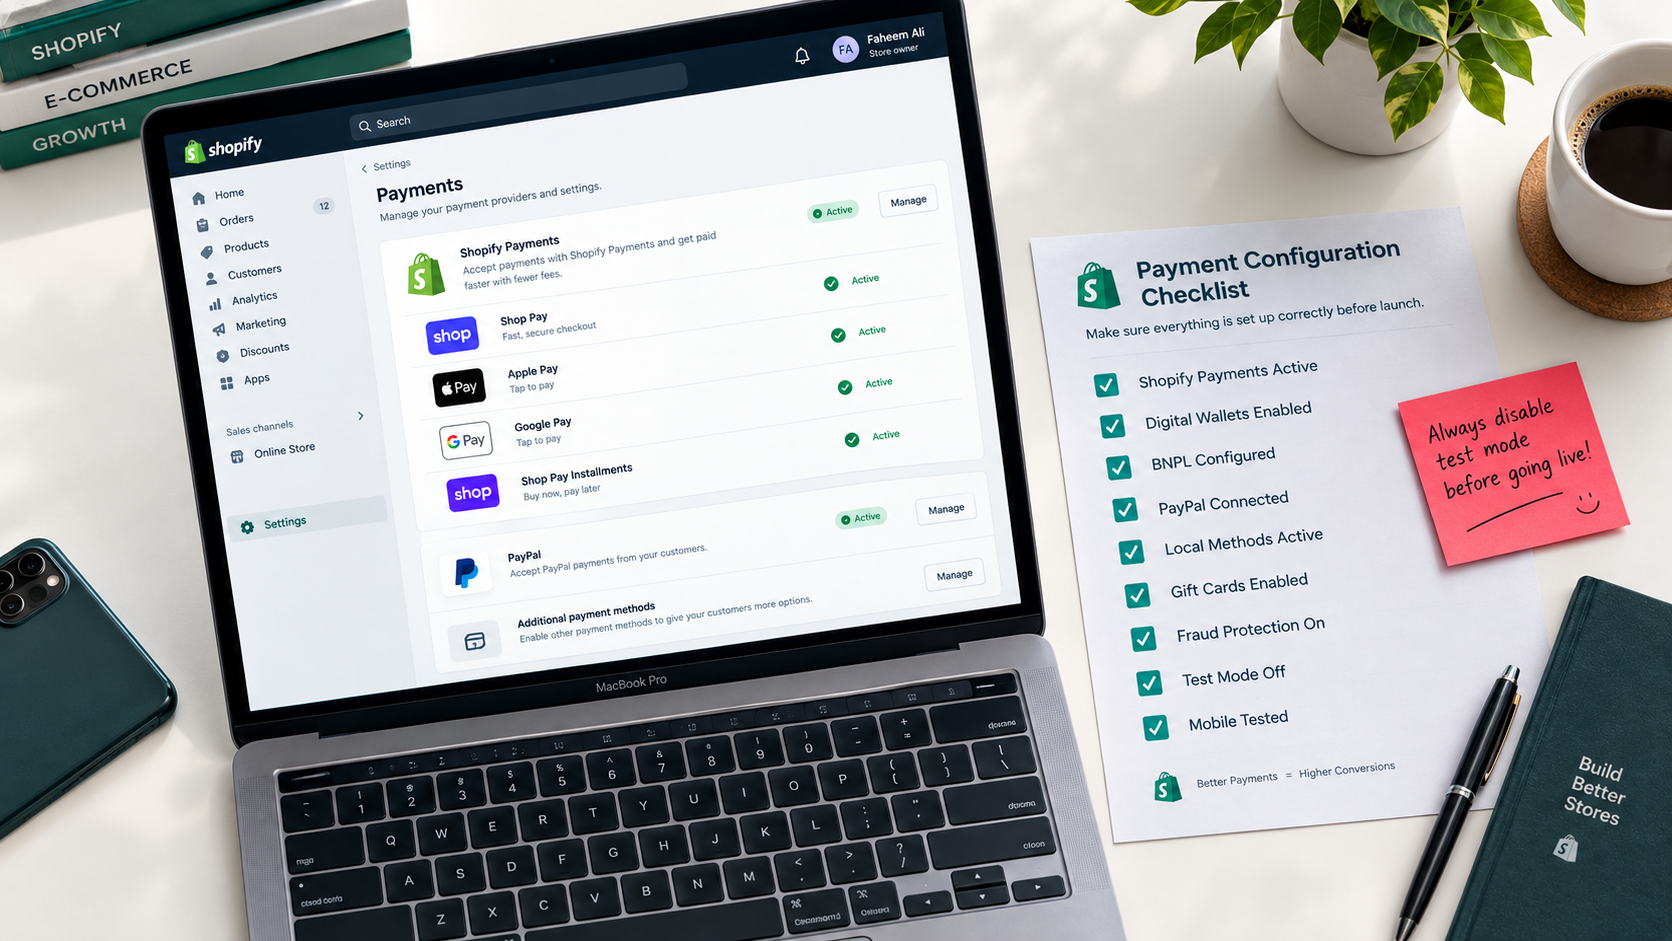
After confirming successful test transactions with Shopify Payments, test the PayPal integration by placing a test order through your PayPal sandbox account. Test Shop Pay by using a registered Shop Pay email to verify the accelerated checkout flow works correctly end-to-end. Test any BNPL options by stepping through the installment selection process to confirm the options appear as configured on both product pages and at checkout.
Disable test mode immediately after testing is complete. Leaving test mode active means real customer payments will not process correctly — a mistake that costs sales and creates difficult customer service situations.
Common Payment Configuration Mistakes That Cost Sales
Not enabling express payment options above the checkout form is one of the most common and most costly configuration oversights. When Shop Pay, Apple Pay, and Google Pay appear as small icons below the standard checkout form rather than as prominent buttons above it, a significant percentage of customers who would have used them do not notice they are available. Verify in your theme settings that express payment buttons appear prominently at the top of both the cart drawer and the checkout page.
Not displaying BNPL messaging on product pages means the affordability signal that would have prevented price hesitation never reaches customers before they start checkout. The customer sees a $150 price point, hesitates, and does not begin the checkout where they would have discovered the four-payments option. Move BNPL messaging to the product page — below the price, above the Add to Cart button — where it reduces price anxiety before checkout begins.
Using third-party processors when Shopify Payments is available wastes 1 to 2% of every transaction on Shopify's additional transaction fee. For a store generating $5,000 per month, this is $50 to $100 per month in unnecessary fees. For a store at $20,000 per month, it is $200 to $400. Audit your current payment configuration and switch to Shopify Payments if you are in a supported country and currently using a third-party processor as your primary payment method.
Not offering local payment methods for international target markets is the most common reason international conversion rates underperform domestic ones beyond the currency display issue. If you have configured Shopify Markets for Germany, the Netherlands, or Belgium and are not offering iDEAL, Sofort, or Bancontact respectively, you are losing a meaningful percentage of customers in those markets who prefer local bank transfer methods over card payments.
Final Thoughts
Payment configuration is not the most exciting part of running a Shopify store. But it is one of the highest-leverage technical configurations available — because every improvement in checkout payment coverage directly recovers sales from customers who were already convinced to buy and simply could not complete the transaction in their preferred way.
A fully configured payment setup takes two to three hours to build correctly. It covers Shopify Payments as the primary processor, digital wallets through Shop Pay, Apple Pay, and Google Pay, BNPL through Shop Pay Installments and at least one third-party provider for higher-AOV products, PayPal for the customer segments that still prefer it, local payment methods for every international market you actively target, and manual payment options for the specific use cases they serve.
Build it once, test it thoroughly, and it runs automatically in the background — converting the customers your marketing is already reaching at every payment preference they bring to your checkout.
Need help configuring Shopify Payments for your store, setting up international payment methods through Shopify Markets, or troubleshooting payment issues that are affecting your checkout conversion rate? Get in touch with EcomFixify — we specialize in Shopify development and ecommerce configuration for growing brands.