
How to Build a Shopify Store from Scratch in 2026
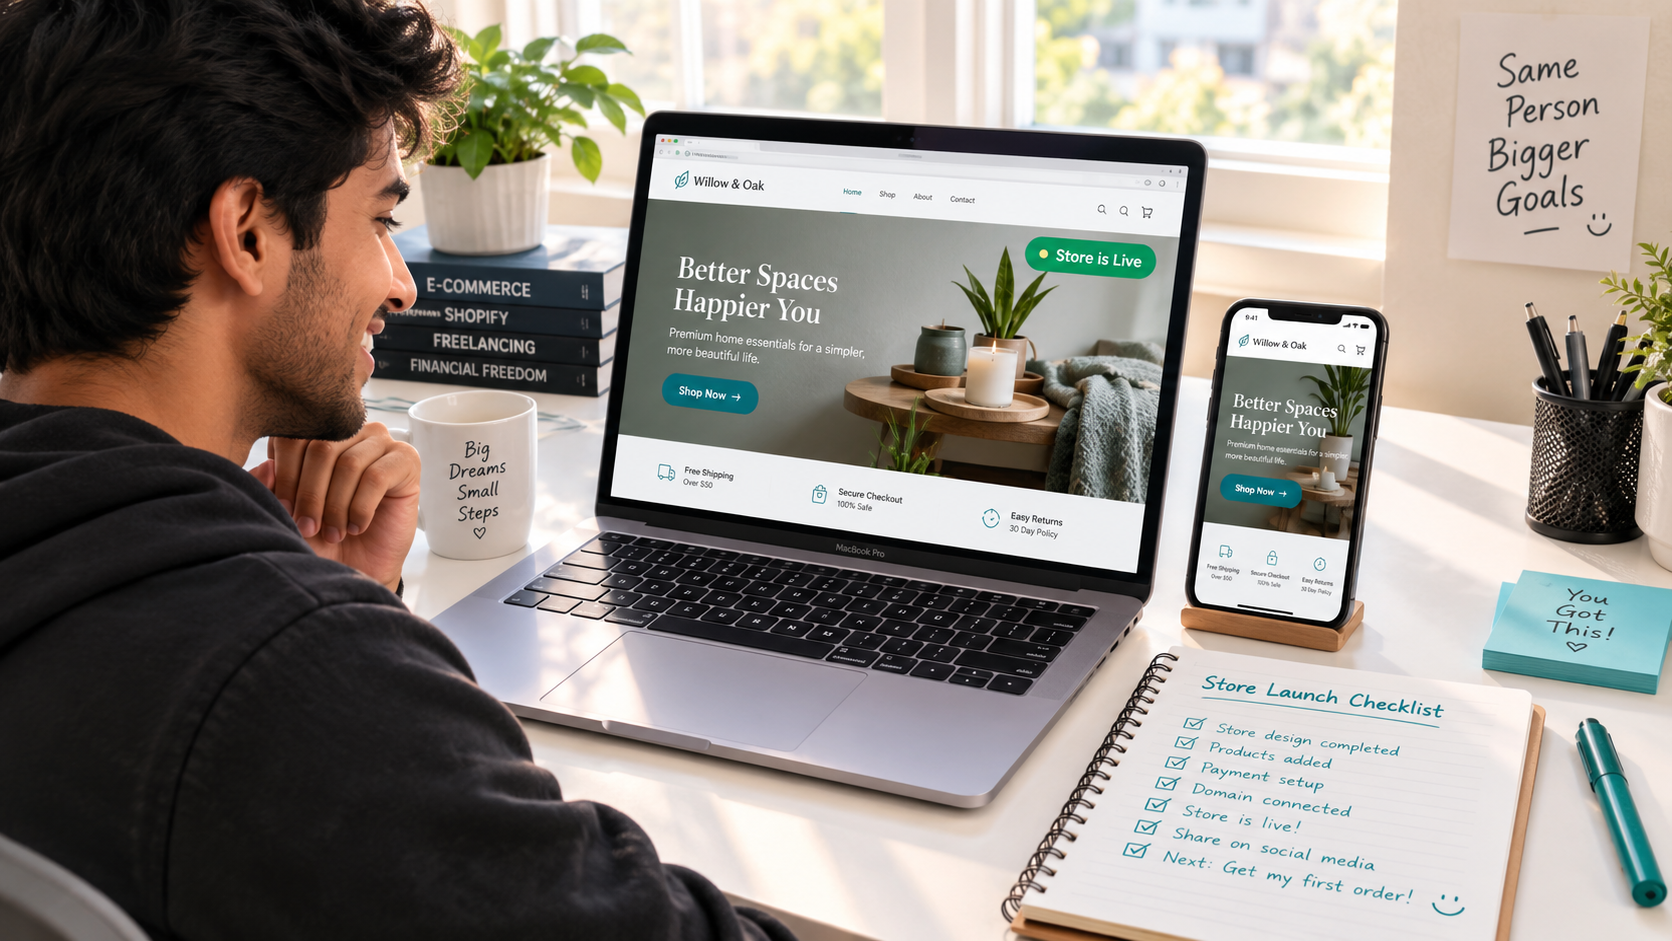
Starting an online store used to require a developer, a designer, a payment gateway account, and weeks of technical setup. In 2026 that is no longer true. Shopify has compressed what once took months into a process that a complete beginner with no coding experience, no design background, and no ecommerce history can complete in three to five days. How to Build a Shopify Store from Scratch in 2026
But there is a difference between setting up a Shopify store and building one that actually sells. The technical steps are straightforward — Shopify's onboarding guides you through most of them. The strategic decisions sitting behind those steps — which niche to enter, which theme to choose and why, how to structure your product pages, what to do immediately after launch — are where most beginners make choices that cost them months of momentum before they figure out what went wrong.
This guide covers both. The technical steps so you know exactly what to do and where to click. The strategic reasoning behind each decision so you understand why each choice matters — and what to avoid when you get there.
By the end of this guide you will have everything you need to build and launch a Shopify store that is structured correctly from day one.
Before You Start: What You Need to Prepare
The biggest mistake beginners make is rushing into Shopify setup before making the foundational decisions that determine whether the store has a chance of succeeding. Spend one to two days on this preparation phase before opening Shopify's sign-up page.
Define Your Niche and Product
Your niche is the specific market segment you are entering — the intersection of a product category, a target audience, and a value proposition that differentiates your store from the dozens of other stores selling similar products.
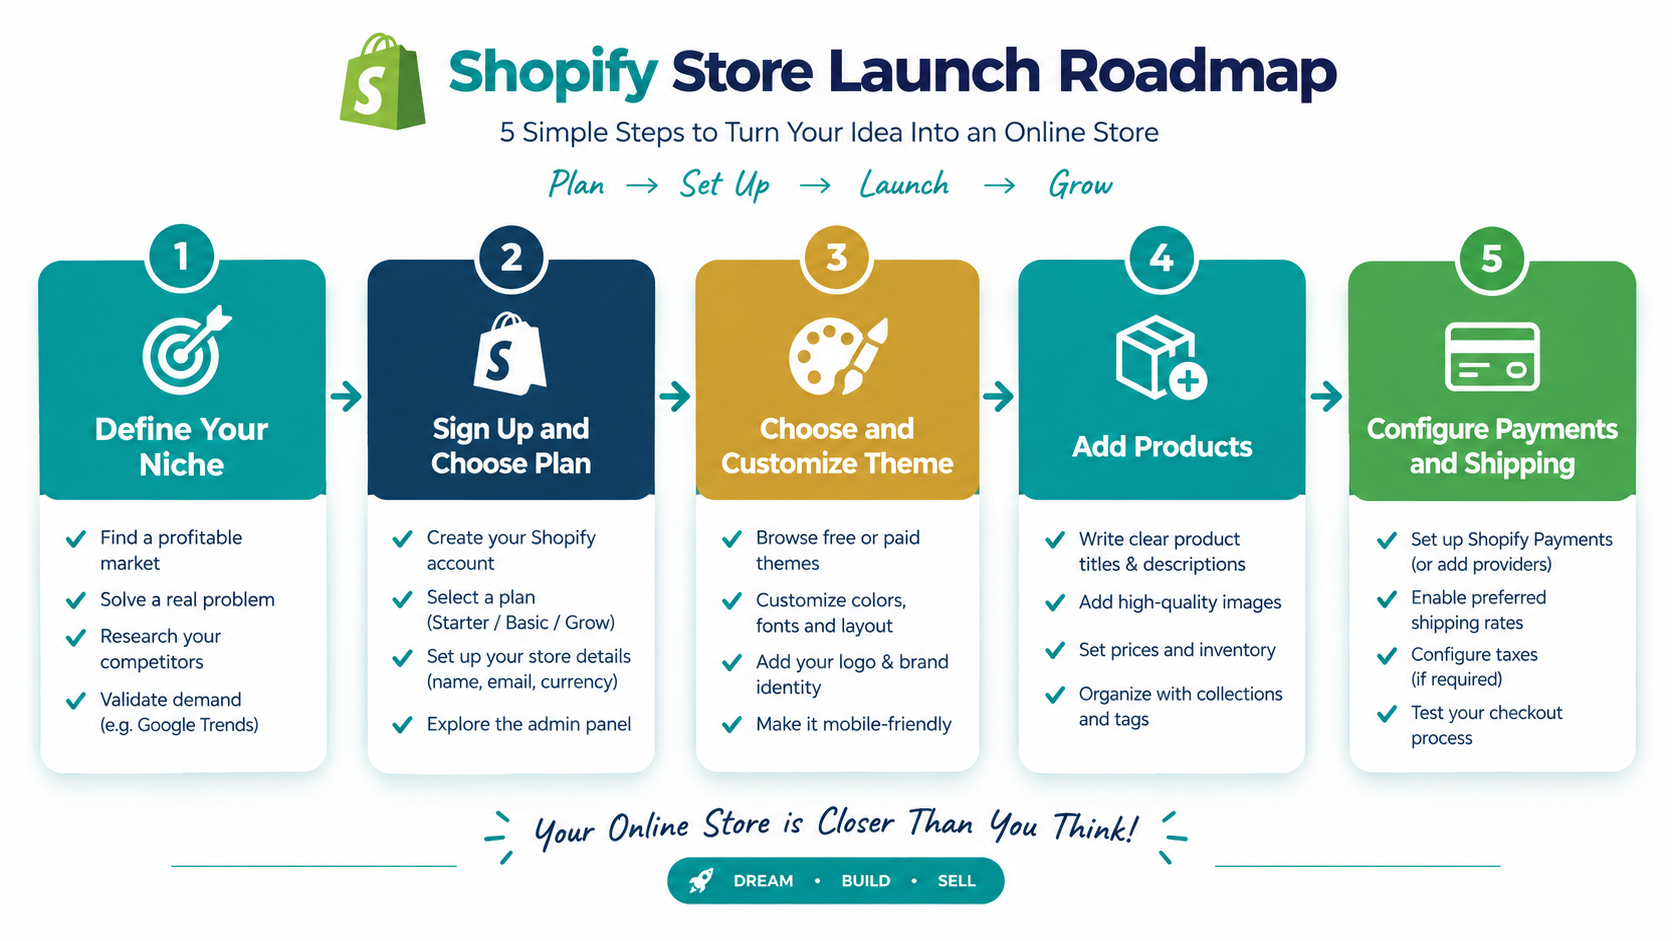
A niche is not "fitness products." It is "resistance bands for women over 40 who want to work out at home without equipment." The narrower your niche at launch, the easier it is to build a focused product page, write targeted marketing copy, and reach the specific audience most likely to buy — rather than competing against established general fitness retailers with years of domain authority and marketing spend behind them.
Use Google Trends to validate that your niche has growing or stable demand. Check Amazon Best Sellers to confirm that products in your niche are actually selling. Browse TikTok for products in your category and look for comment intent — comments asking "where can I get this?" or "what is the name of this product?" confirm that purchase intent exists in your target market.
Decide on Your Business Model
There are four primary business models for Shopify beginners in 2026:
Dropshipping — a supplier ships orders directly to your customer, and you never hold physical inventory. Lowest startup cost, lowest margin. Best for validating product ideas before committing to inventory.
Print on demand — suppliers print custom designs on products like t-shirts, mugs, and phone cases only when an order is placed. No inventory required. Best for design-focused brands and merchandise.
Wholesale and resale — you purchase products from a supplier at wholesale prices and sell at retail markup. Requires upfront inventory investment but offers better margins and faster shipping than most dropshipping options.
Own product creation — you manufacture or create your own products. Highest margin and brand differentiation, highest complexity and startup cost.
Your business model determines your supplier relationships, your startup budget requirements, and your operational workflow. Make this decision before building your store — it affects everything from your pricing to your shipping settings.
Prepare Your Business Basics
You do not need a registered company to start a Shopify store — you can begin as a sole trader or individual and register formally once revenue justifies the administrative overhead. But you do need a few things before setup:
A business name that is available as a domain — check availability on Namecheap or through Shopify's domain search before committing to a store name. Your store name becomes part of your branding and your domain, and changing it later creates unnecessary confusion.
A professional email address — a Gmail or Yahoo address in your store contact details signals an amateur operation to customers evaluating whether to trust you with their payment details. Set up a professional email — hello@yourstorename.com — through Google Workspace at $6 per month or through your domain registrar.
A bank account or payment destination for receiving funds — Shopify Payments deposits to a bank account, and you will need this information during payment setup. If you are in Pakistan, you will likely be using a Payoneer or Wise account connected to an international payment gateway since Shopify Payments is not currently available in Pakistan. Plan this before launch so your first sale has a clear path to your bank.
Step 1: Create Your Shopify Account and Start Your Free Trial
Go to shopify.com and click Start free trial. Enter your email address, create a password, and choose a store name. Your store name creates your temporary Shopify domain — yourstore.myshopify.com — which remains your permanent backend URL even after you connect a custom domain.
Shopify's onboarding wizard asks a series of questions about your business — what you are selling, whether you are already selling elsewhere, your revenue stage. Answer honestly. The platform uses these answers to configure your initial setup and recommend relevant features. There are no wrong answers that affect your store's functionality.
Choose your plan after the free trial period. In 2026, Shopify's plan structure is:
The Basic plan at $29 per month covers everything a beginner needs — online store with unlimited products, Shopify Payments, two staff accounts, and all core ecommerce functionality. This is the correct starting point for the vast majority of new merchants.
The Shopify plan at $79 per month adds five staff accounts, professional reports, and lower transaction fees. This becomes cost-effective once your monthly revenue exceeds approximately $2,000 to $3,000 — at which point the lower transaction fees more than offset the additional monthly cost.
The Advanced plan at $299 per month is for established stores that need advanced reporting and third-party calculated shipping rates at checkout. You do not need this at launch.
Start on Basic. Upgrade when your revenue makes the math work.
Step 2: Choose and Customize Your Theme
Your theme is the visual template that determines your store's layout, design, and customer-facing experience. Shopify's Theme Store includes both free themes — eleven options maintained by Shopify directly — and paid themes ranging from $150 to $450 as a one-time purchase.
For beginners, start with a free theme. The free options in 2026 are genuinely excellent — Dawn, Shopify's flagship free theme, powers hundreds of thousands of stores and is built specifically for Core Web Vitals performance and mobile-first browsing. Craft is strong for stores with a small, curated product range. Sense suits beauty and wellness brands. Refresh suits lifestyle brands with a modern aesthetic.
The criteria that matter when choosing a theme for a beginner are simplicity — complex themes with advanced animations and heavy JavaScript create page speed problems that hurt both SEO and mobile conversion; mobile optimization — since approximately 74 to 79% of your traffic will arrive on mobile devices, the mobile layout is more important than the desktop layout; and product page flexibility — look at how the theme displays products on a mobile screen and whether the Add to Cart button is visible without scrolling.
Do not spend more than a few hours on initial theme customization. The most common beginner mistake is spending two weeks perfecting a theme before adding a single product — a perfectly designed store with no products and no traffic generates zero revenue. Get the basics right — your brand colors, your logo, your homepage hero section — and move on to products.
Customization basics to complete before launch:
Upload your logo in Settings → Brand in your Shopify admin. Set your brand colors and fonts in the theme editor (Online Store → Themes → Customize). Build a simple homepage with a hero image or banner, a featured collection of your best products, and a brief brand statement that communicates who the store is for and what it offers. Everything else can be refined after launch.
Step 3: Add Your Products
Products are the center of your Shopify store — everything else exists to help customers find and buy them. Each product you add in Shopify requires the same core information to display correctly and convert effectively.
Navigate to Products in your Shopify admin and click Add product. Complete every field deliberately:
Product title — use the format that combines what the product is with who it is for and what makes it different. "Resistance Bands Set for Women — Non-Slip, Heavy Duty, 5 Levels" communicates the product, the audience, and two key features in a single scannable title. Avoid vague titles like "Fitness Bands" that give customers no information to evaluate.
Product description — use the two-layer approach covered in EcomFixify's product page guide. Open with two to three sentences about the benefit the customer receives — not what the product is, but what it does for them. Follow with bullet-point specifications covering materials, dimensions, what is included, and any care or compatibility information. This structure satisfies both the emotional motivation to buy and the rational need to confirm specifications.
Product images — upload a minimum of four images per product: the product on a clean white or neutral background as the hero image, at least two additional angles showing key features, and one lifestyle image showing the product in use. Resolution should be at least 2000 × 2000 pixels for Shopify to enable zoom functionality on desktop.
Pricing — enter your selling price in the Price field. If the product is on sale or you want to display a compare-at price for anchoring purposes, enter the higher original price in the Compare-at price field. Shopify automatically displays this as a crossed-out price, signaling a discount without requiring any additional configuration.
Inventory — enable inventory tracking and enter your starting quantity. This allows Shopify to prevent overselling and gives you accurate stock visibility as orders come in. Add an SKU code — even a simple one like BAND-RED-HEAVY — for inventory management purposes.
Shipping — enter the product's weight and dimensions. This information is used for carrier-calculated shipping rates if you enable them, and for accurately estimating shipping costs in your own pricing calculations.
SEO — scroll to the bottom of the product page to the Search engine listing section. Write a meta title of 50 to 60 characters that includes your primary keyword. Write a meta description of 150 to 160 characters that describes the product accurately and includes a call to action. These fields are what appear in Google search results and directly influence whether someone clicks through to your store.
Step 4: Set Up Your Collections
Collections are the grouped categories within your store — Shopify's equivalent of departments in a physical store. Every product belongs in at least one collection, and well-structured collections are essential for both customer navigation and Google's understanding of your store's structure.
Navigate to Products → Collections and click Create collection. Create collections that reflect how your customers think about your products, not how you think about your inventory. A customer shopping for "summer dresses" will look for a Summer or Dresses collection — not a collection organized by your supplier's product codes.
For a store launching with 10 to 30 products, three to five collections is typically the right structure. A Best Sellers collection — a manually curated list of your highest-converting or most popular products — should be featured prominently on your homepage and in your navigation because it surfaces social proof and decision-simplification simultaneously.
Step 5: Set Up Shopify Payments and Payment Methods
Navigate to Settings → Payments in your Shopify admin. This is the most consequential setup step because an incorrectly configured payment system prevents your store from completing orders.
Shopify Payments is available to merchants in the US, UK, Canada, Australia, and a growing list of countries. If your store is based in one of these countries, enable Shopify Payments as your primary payment processor — it is the most deeply integrated option, supports Shop Pay accelerated checkout, and carries the lowest transaction fees of any available option.
For merchants based in Pakistan — where Shopify Payments is not currently available — the standard approach is connecting Stripe through a verified US or UK business entity, or using PayPal as the primary payment method for international customers. Payoneer and 2Checkout also integrate with Shopify and process international payments. Research the option that works within your specific business structure.
Regardless of your primary payment processor, enable every available accelerated checkout method — Shop Pay, Apple Pay, and Google Pay — in the Accelerated checkouts section of your payment settings. These one-tap checkout options reduce mobile checkout friction significantly and directly improve conversion rates for returning customers and anyone with payment credentials already saved on their device.
Step 6: Configure Shipping Settings
Navigate to Settings → Shipping and delivery. Shipping configuration is the technical step most beginners do incorrectly — and incorrect shipping settings either prevent orders from being placed or charge customers the wrong amount, both of which create immediate operational problems.
Create shipping zones based on where you are shipping. If you are shipping domestically only, create one zone covering your country. If you are shipping internationally, create zones by region — domestic, North America, Europe, Rest of World — and set appropriate rates for each.
For each zone, you have three rate options. Flat rate — a fixed amount regardless of order size or weight. Calculated rates — automatically calculated by carriers like UPS, USPS, or FedEx based on actual package dimensions and destination. Free shipping — which can be configured either as universally free or triggered above a specified order value threshold.
The free shipping threshold strategy is one of the highest-impact checkout optimizations available to any Shopify store. Setting a free shipping threshold at 20 to 30% above your average order value — and displaying this threshold prominently throughout the store — creates a consistent AOV lift as customers add additional items to qualify. A store with a $45 average order value that sets free shipping at $55 will see a meaningful percentage of customers adding one more item to cross the threshold.
Display your shipping policy clearly on product pages and in the cart. Unexpected shipping costs revealed at checkout are the single most common cause of cart abandonment across all ecommerce platforms — making shipping transparency on product pages one of the simplest and most impactful conversion improvements available.
Step 7: Create Your Essential Store Pages
Beyond product pages, every Shopify store needs five standard pages that establish credibility, meet legal requirements, and answer the questions customers ask before buying from a brand they have never encountered before.
Navigate to Online Store → Pages in your Shopify admin and create each of these:
About Us — tell the story behind your brand. Who started it, why, what problem the brand solves, and what values guide how you operate. Customers who read an About Us page that feels genuine and human are significantly more likely to complete a purchase than those who encounter a faceless storefront with no visible identity behind it. Keep it under 400 words, include a photograph if you are comfortable doing so, and write it in first person rather than corporate third person.
Contact Us — include a contact form, your business email address, and your expected response time. A visible contact method is a trust signal — it confirms that real people are behind the store and that customers have a path to resolution if something goes wrong with their order.
Privacy Policy — Shopify provides an automatic generator under Settings → Legal that creates a compliant privacy policy template populated with your store's details. Generate this, review it for accuracy, and publish it. A published privacy policy is a legal requirement in virtually every market where you will sell and is checked by advertising platforms before approving your ad account.
Terms of Service — also generated automatically by Shopify under Settings → Legal. Review, customize if needed, and publish.
Shipping and Returns Policy — write this yourself based on your actual shipping timelines and return policy. Be specific: "Orders are processed within one to two business days. Delivery to US addresses typically takes five to ten business days. Returns accepted within 30 days of delivery in original condition." Vague policies create customer service problems. Specific policies set accurate expectations that reduce complaints and returns.
Step 8: Set Up Your Navigation
Navigate to Online Store → Navigation. Your store navigation should be simple, intuitive, and designed around how customers think about your products — not around your admin structure.
A standard navigation for a beginner Shopify store: Shop or All Products linking to your main collection, individual collection links for your two to three most important product categories, About linking to your About Us page, and Contact linking to your contact page. Keep the main menu to five items maximum — every additional menu item dilutes the attention available for the items that matter.
Add a footer menu with links to your Privacy Policy, Terms of Service, Shipping Policy, and Contact page. These links serve both legal compliance purposes and customer trust — they communicate that your store operates professionally and has thought through the customer experience beyond the point of purchase.
Step 9: Install Your Essential Apps
The Shopify App Store contains over 8,000 apps — and one of the most common beginner mistakes is installing too many. Every app you install adds JavaScript to your store's frontend, slowing page load times and potentially conflicting with other apps. Start with the absolute minimum and add apps only when a specific operational or marketing need clearly justifies them.
The essential apps for a beginner Shopify store in 2026:
An email marketing app — Klaviyo's free plan covers up to 250 subscribers and 500 monthly email sends, making it the correct starting point for email list building and the one to two automated flows you need before launch. Shopify Email is a simpler alternative built directly into Shopify admin for merchants who want basic email functionality without a third-party integration.
A reviews app — Judge.me's free plan allows unlimited reviews and displays star ratings on product pages and in Google search results through structured data markup. Product reviews are the most effective trust signal on any product page, and starting to collect them from your first customers is essential.
A sticky Add to Cart app — for stores whose chosen theme does not include a native sticky mobile ATC bar, installing one is the highest-ROI single app available. When the Add to Cart button follows customers as they scroll through product descriptions on mobile, add-to-cart rates on mobile increase measurably.
A page speed app — Shopify's free Speed Booster tools in the admin compress images and defer non-critical scripts automatically. For additional optimization, Crush.pics handles image compression automatically on upload, and TinyIMG manages WebP conversion and alt text across your product catalog.
Step 10: Test Your Store Before Going Live
Before removing your storefront password and going live, run a complete end-to-end test of every critical customer journey.
Place a test order using Shopify's test payment method — found in your Payments settings under the Bogus Gateway option — and complete the full checkout flow on both desktop and mobile. Verify that the order confirmation email arrives correctly with accurate order details. Verify that you receive the order notification in your Shopify admin. If you are using a fulfillment app, verify that the order routes correctly.
Test your contact form by submitting an inquiry and confirming it arrives at your business email. Test every page link in your navigation to confirm there are no broken links or 404 errors. Open your store on an actual smartphone — not a browser's mobile simulation — and navigate through a product page to checkout, paying specific attention to whether text is readable without zooming, whether buttons are large enough to tap accurately, and whether the Add to Cart button is visible throughout the product page scroll.
Review every product description for accuracy — verify pricing, confirm shipping weight entries are realistic, and confirm that inventory quantities are correctly entered. Check that your About Us, Privacy Policy, Terms of Service, and Shipping Policy pages are all published and accessible from your footer navigation.
Step 11: Remove Your Storefront Password and Go Live
New Shopify stores are protected by a storefront password by default — which prevents the public from seeing your store while you are building it. To go live, navigate to Online Store → Preferences and scroll to the Password protection section. Uncheck the Enable password box and save. Your store is now publicly accessible.
Select your Shopify plan before going live if your free trial has ended or is about to end. Navigate to Settings → Plan and select your plan. Shopify will prompt you for billing information if not already collected.
The 48 Hours After Launch: What to Do First
A live store with no traffic generates no sales. The 48 hours following launch are the most important marketing window your store will have — you have the energy, the excitement, and the brand-new product novelty that is genuinely helpful for organic content performance.
On launch day: post an announcement across every personal and professional social media account you have. Tell your story, show your product, and share a direct link to your store. This warm audience — people who already know and trust you — is your highest-converting initial audience because they have a pre-existing reason to support your launch.
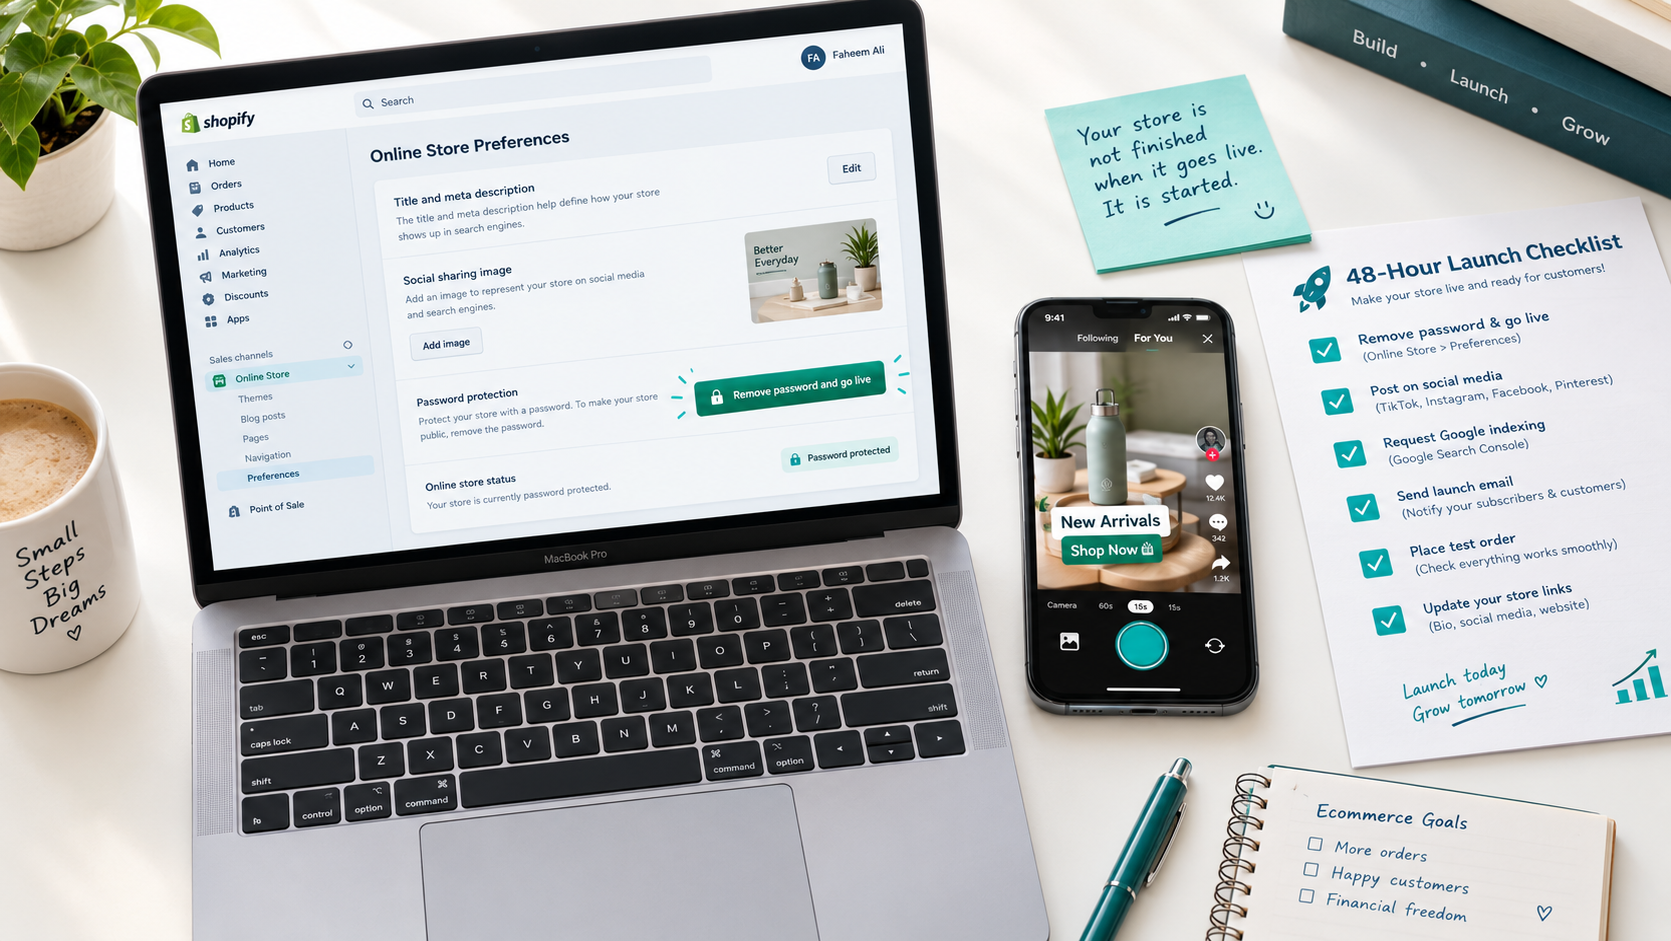
Create a short-form video demonstrating your hero product and post it to TikTok and Instagram Reels with relevant hashtags and a link to your store in bio. This does not need to be professionally produced — genuine enthusiasm and a product that clearly solves a visible problem performs better than polished production on short-form video platforms.
Send your first email campaign to your launch list if you have been building an email waitlist or notified friends and contacts to sign up before launch. A launch email with a first-order discount and a direct product link converts at significantly higher rates than any cold audience campaign.
In the first week after launch: request indexing for your store's key pages — homepage, collection pages, and your top product pages — in Google Search Console. Consistent publishing of one or two blog posts per week targeting product-relevant search queries builds organic traffic over the three to six month timeline that SEO typically requires to show meaningful results.
The Realistic Timeline for Your First Sale
Most new Shopify stores generate their first sale within the first two weeks when the merchant actively markets the store from day one. Stores that launch and wait passively for organic traffic typically wait significantly longer.
The milestones to target in your first 90 days:
Week one and two — launch, first warm audience promotion, first social media content. Goal: first one to five sales.
Week three and four — establish a content posting rhythm on your primary organic channel, publish two to three blog posts targeting buyer-intent search terms, refine your product page based on any early feedback. Goal: ten to twenty total sales.
Month two — evaluate which traffic sources and products are converting, invest in paid advertising if your organic conversion rate is above 1% confirming the store converts, and begin email list building in earnest. Goal: consistent weekly sales.
Month three — review your analytics, identify your highest-converting products and traffic sources, double down on what is working, and begin planning catalog expansion based on what your first 90 days of data reveals. Goal: predictable, growing monthly revenue.
Final Thoughts
Building a Shopify store from scratch in 2026 is genuinely achievable for any beginner who follows the right steps in the right order. The platform handles the technical infrastructure. The strategic decisions — niche selection, product positioning, pricing, and marketing channel — are yours to make, and this guide covers the framework for making them correctly from the start.
The one thing that separates the merchants who build something real from the ones who launch and stall is execution speed. Do not spend two weeks perfecting your theme. Do not wait until your store looks perfect to start marketing. Get products live, place a test order, remove the password, and start telling people the store exists. Everything after that is optimization built on real data from real customers — which is the only kind of data worth making decisions from.
Your store is not finished when it goes live. It is started.
Need help building or optimizing your Shopify store, or want an expert to review your store setup before launch to ensure everything is configured correctly? Get in touch with EcomFixify — we specialize in Shopify development and ecommerce growth strategy for brands building from the ground up.